FC 27 has been live for over a month now, and the season has reached the stage where squad depth and tactical detail matter. If you are still using the static attacking setup you ran at the start of the season, you will easily fall into the awkward situation of “60% possession, two shots” against Elite-level opponents whose defensive positioning is drilled into muscle memory. The following setup comes from a player who performed well in two early-season tournaments. The core idea is not complicated, but the combination of several player roles creates a rotation effect that is hard for both the defensive AI and human opponents to track. The original creator’s own words were “free goals,” which is an exaggeration, but the logic holds up.
First, lock down the defensive baseline: 60 depth + sweeper keeper
Counter is the starting point, and Balanced is the defensive style. The original creator habitually sets the defensive line depth to 60, and says one key thing very clearly: he hates being played through by through balls, so much so that he would “rather be cooked by an actual combination and concede a good goal than be broken by a random ball over the top.” 70 or even 90 depth is not unplayable, but under the current strength of through-ball and run AI in FC 27, 60 is a level that balances “pressing” and “not being punished behind the line.”
Use a Sweeper goalkeeper. The reason is very direct: when opponents try to play through balls behind your center-backs, a sweeper keeper’s tendency to come out will help you concede fewer of those “goals that look like they should not have happened.” Use Full Back – Balanced for both full-backs, and the most basic Center Back – Defend for the center-backs. This back-line setup is not flashy, but it is the anchor of the whole tactics board. You do not need to experiment too much here.
The most counterintuitive part of midfield: B2B is more stable than a pure “holding” role
The original creator puts Box-to-Box on the right central midfielder and specifically explains why he does not use Holding. His observation is that Holding produces an AI behavior in defensive transitions where “the player is clearly nearby but just does not enter the defensive action,” while B2B, although its initial positioning may not be as deep, will actually drop back in front of the defense and participate in defending as long as you manually delay the first wave of the counter. In other words, Holding gives “nominal protection,” while B2B, under the premise that you manually defend in position, gives actual recovery.
Use B2B – Balanced on the right midfield so he has room to cover the flank, because the narrow formation itself has limited width, and someone in midfield needs to shift out to match the opponent’s full-back or inverted winger. The left midfield is one of the “engines” of this tactic: Playmaker – Attack. The original creator links the left midfield, the CAM, and the forward line into a triangle, and the movement of the three roles triggers each other. This will be expanded below.
The rotation game of the front three: false nine drops, shadow striker fills the hole
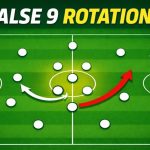
The forward line is the most recognizable part of this tactic. Use False Nine – Attack at ST and Shadow Striker – Attack at CAM. The false nine will drop back near the midfield line to receive the ball and drag the opposing center-backs out; at the same time, the shadow striker runs forward from the CAM position and slots exactly into the gap left behind when the center-backs are pulled out. The original creator’s description is vivid: “Ziko sometimes just glitches between the two center-backs, and they do not mark him.” This is not some hidden mechanic; it is the spatial mismatch triggered in the same frame by the false nine dropping and the shadow striker running forward.
The left midfielder’s Playmaker – Attack role completes the triangle. After the false nine drops, the left midfielder can push forward into the half-space to receive, forming a short passing triangle with the shadow striker and the false nine. If the opponent follows the false nine out, there is space behind the shadow striker; if the opponent does not follow, the false nine can turn and face the defense to play a through ball. The original creator repeatedly emphasizes “look at Stanway’s positioning” in the video. Essentially, he is saying: the defending side has to choose “who to follow” every time, and that moment of hesitation is the opportunity.
Imagining the in-game picture: two seconds after a turnover
Put the roles above into a specific sequence, and it looks roughly like this. The opponent loses the ball in midfield, and your right B2B picks it out and gives it to the dropping false nine. If the opposing center-back follows him out, the shadow striker immediately starts from the blind side, the false nine plays a one-touch pass, and the shadow striker faces the goalkeeper; if the center-back does not follow, the false nine turns, the left midfielder playmaker has already pushed into the half-space, the full-back overlaps, the weak-side winger tucks inside, and the defensive line is stretched by the lateral movement. Almost all the chances edited into the original creator’s video are variants of this flow. It does not necessarily convert every time, but the frequency of chances appearing is indeed higher than with a conventional static 4-2-3-1 progression.
The cost of this tactic is also clear: when the opponent’s counterattack quality is very high, the B2B midfielder may indeed not be in position for the first moment. The original creator’s solution is to “manually delay the first wave.” If you are used to letting the AI defend automatically, this midfield setup will test your manual defending habits more than a double-Holding setup.
Player selection and where FC 27 Coins should go
This tactic does not require every position to be a million-coin card, but the traits and playstyles of two positions are relatively key. The false nine should ideally have decent short passing and ball control to make the first pass after dropping back stable; the shadow striker needs enough attacking positioning and shooting, because many chances are “half one-on-one” in nature, and the first touch and finishing decide the payoff. The B2B midfielder’s stamina should not be too low, and the playmaker needs passing playstyles to support the fluency of the triangle’s short passing.
If you plan to use FC 27 Coins to speed up upgrades, the priority order is: false nine > shadow striker > left midfielder playmaker. The back line and B2B can use cost-effective cards as a transition, while the linkage quality of the front three directly determines whether this tactic can produce the kind of “defense cannot read it” effect shown in the video. When you search for terms like Cheap FC 27 Coins at the MMOEXP online store, the key is not to find the lowest price column, but to first check three things: whether the platform matches your Ultimate Team account, whether the inventory status shown on the page is pre-order or in-stock, and what the delivery instructions ask you to do. MMOEXP maintains a 4.8 rating on Trustpilot based on tens of thousands of reviews. Some players mention delivery speed and customer service response as the main positives, but there are also cases where individual order statuses need follow-up. So a relatively safe approach is to treat it as a reference point where you should first look at the delivery terms and after-sales entry: if you were already planning to choose a third party, MMOEXP’s page transparency and customer service online hours are reasons worth taking a first look before deciding, but before ordering, checking the platform, inventory, and refund terms is always more reassuring than “rushing in as soon as you see cheap.”
Final note: this tactic is strong in “creating choices,” not in “guaranteed goals”
The original creator jokes in the video that he is “like a genius,” but what really makes this setup work is not some invincible code, but the fact that when the false nine dropping, the shadow striker running forward, and the playmaker pushing up happen at the same time, the defending side has no standard answer. FC 27’s defensive AI is already quite mature when dealing with a single run, but it still loses track or hesitates when faced with continuous position swaps and role exchanges. If you set the instructions for these three roles correctly, you will immediately feel more chances appear below Elite; at Elite, what you need to do is fine-tune the false nine’s dropping depth according to the opponent’s defensive habits, or change the left midfielder from Playmaker Attack to a more conservative version to preserve midfield numbers.
A tactics board is ultimately a starting point, not the endpoint. First get the rotation of these three players running, then adjust depth and width according to your actual manual feel. That is much more practical than directly copying a “god tactic code” and then complaining, “Why does it not work when I use it?”